Introduction
Button Tentacle is an open hardware button. It is connected to the Internet via Wi-Fi. It has to be connected to the power via USB cable. Pressing it can trigger action in your Flow.
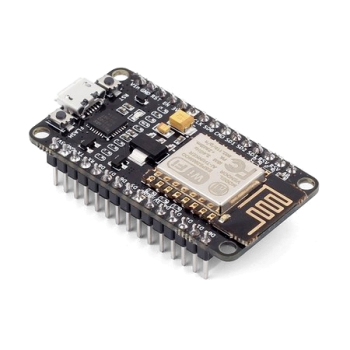
Button Tentacle is based on the NodeMCU v2 (with CP2102 chipset). The required open hardware device can be obtained for example from here.
How to build
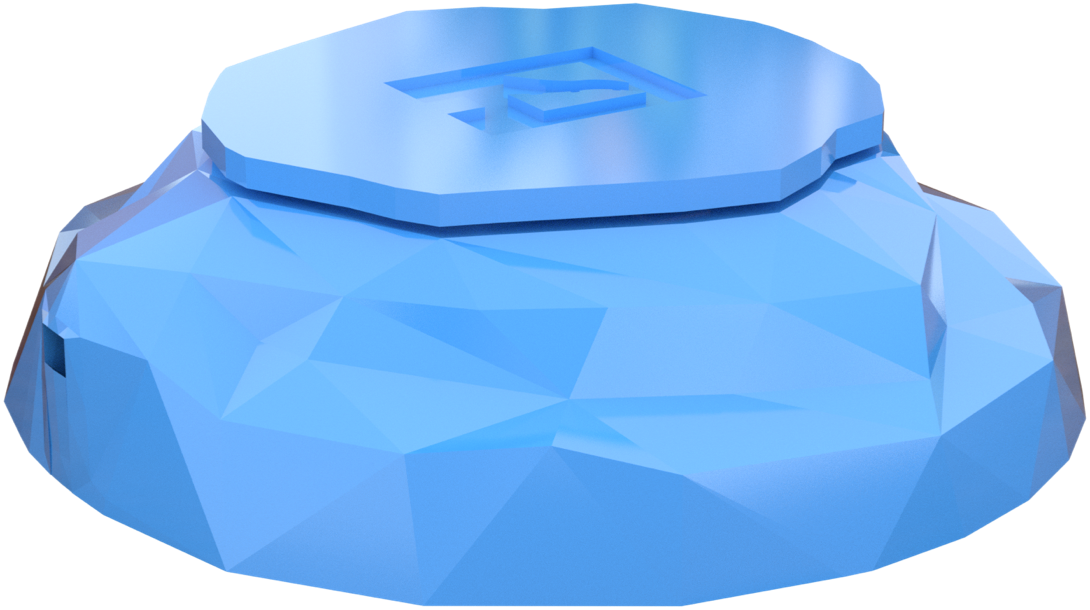
Download and 3D print a cute 3D Printable Case for the Display Tentacle from Thingiverse.
Components
The following components are needed for your Button Tentacle:
1xNodeMCU v2 CP21021xUSB-A to micro-USB cable
You will need a 3D Printer if you plan to use the open source case for Anemone Button Tentacle. But you can definitely use the Button Tentacle without any case as well, it just does not look so awesome ;). If you are not sure which 3D printer to buy or use, we can recommend Prusa i3 MK2S - we have designed and printed the case on this one.
Instructions
No soldering skills or any kinds of nuts is required to assemble this Tentacle
- Download the 3D printable open source case for Anemone Button Tentacle from Thingiverse.
- 3D print it (detailed instructions how to print it are on the Thingiverse link in step 1.)
- Assemble the 3D printed case - it comes in 5 parts.
- First you need to put the both small “Y” like legs into the top part of the button - their dimensions are done in a way, that you cannot do it in the wrong way.
- Then you should plug the USB cable to your NodeMCU v2.
- Then put your NodeMCU v2 into the bottom part. Its legs should fit into the holes in the bottom part nicely.
- Then you should put the circular walls/border part on top of the bottom part where your NodeMCU v2 is mounted. Make sure both parts are aligned at the bottom - so your Button Tentacle can stand on the table firmly.
- Last step is to gently put the top part with the “Y” like legs attached on the NodeMCU v2. The cone like structure on the bottom side of the top part will press the
Flashbutton on the NodeMCU v2 when the button is pressed.
- Follow the instructions on your Tentacle detail page in the Anemone Dashboard where is described how the generated
.inosketch files should be uploaded.
How to use
Button Tentacle is directly supported by the Anemone IoT Platform. When adding a Tentacle, select a Button as its type. Mr. Cloud will generate a sketch which can be used to program the NodeMCU v2 device accordingly. Instructions how to program the device will be shown on your Tentacle detail page together with a button to download the generated sketch .ino file.
The generated
.inofile uses the well known Arduino Ecosystem.
You can use the Serial Monitor in the Arduino IDE to debug the Tentacle - the Tentacle is writing there what it is doing.
| Previous chapter: Cloud / Tentacles | Next chapter: Devices / Display |